01.mac使用小结

1 v2rayu代理工具
第一个要安装的软件绝对是代理工具,不然后面的配置难以进行。在国内,使用代理工具可以解决国外数据源访问慢(如:github),访问卡(如:npm)等等网络数据不通的问题。v2ray是首选,v2rayv是mac下的基于v2ray开发的mac用户端的工具之一,用过都说好。工具下载好还需要自己搭建下代理服务器,搭建方法可以去github找v2ray的官方源码说明,也可以参考这个一键安装脚本
下载用户端下载地址:
【最新版】github下载
2 配置bash环境代理
v2rayv安装好后并配置好要使用的代理服务器后,启动并在点击启动图标,下面有个选项,让你复制代理代码,默认是:
$ export http_proxy=http://127.0.0.1:1087/;export https_proxy=http://127.0.0.1:1087/;
运行后当前bash环境下的http请求会经过代理来处理.
2.2 ssh 连接代理
如果对一台机直接ssh连接也能通过代理来连接。在~/.ssh/config中加入
Host *
    ProxyCommand nc -X 5 -x localhost:1087 %h %p
意思是对ssh下的连接由于本地的localhost:1087来代理。*是连接别名通配的意思。
3 homebrew安装
$ mkdir homebrew && curl -L https://github.com/Homebrew/brew/tarball/master | tar xz --strip 1 -C homebrew
由于官方推荐安装到个人的目录下,所以以上的命令会把homebrew安装到个人目录的~/homebrew,需要把启动文件加入环境变量才能使用brew,执行:
$export PATH="~/homebrew/bin:$PATH"
4 安装oh my zsh
$sh -c "$(curl -fsSL https://raw.github.com/ohmyzsh/ohmyzsh/master/tools/install.sh)"
4.1 配置zsh默认配置文件~/.zshrc
4.1.1 默认代理
安装完后,系统会默认安装好zsh,想要之前的代理默认生效需要在~/.zshrc加入:
export http_proxy=http://127.0.0.1:1087/;
export https_proxy=http://127.0.0.1:1087/;
也可以定义命名别名来实现启动和关闭,在~/.zshrc加入
alias ipcn="curl myip.ipip.net"
alias ip="curl ip.sb"

# 设置http https代理
proxyIp="192.168.1.102:1080"
function setProxy()
{
        export http_proxy=http://${proxyIp} && export https_proxy=http://${proxyIp}
        git config --global https.proxy http://${proxyIp} && git config --global https.proxy https://${proxyIp}
        echo "set proxy successfully"
}

# 解除http https代理
function unSetProxy()
{
        git config --global --unset http.proxy && git config --global --unset https.proxy;
        unset http_proxy;unset https_proxy;unset all_proxy;
        echo "Unset proxy successfully";
}

# 上面这几个 alias 是自定义的命令
# ip & ipcn  查看 IP
# setProxy 设置代理
# unSetProxy 解决代理
注: 以上的命令行参考处
4.1.2 默认brew
由于brew是安装在自己的目录下的,需要在~/.zshrc中加入环境变量配置,才能默认生效。
export PATH="~/homebrew/bin:$PATH"
更多oh my zsh配置参考《【linux】Oh-My-Zsh使用笔记》
5 安装iterm2
[官方下载地址](https://www.iterm2.com/)
6 安装字体
如果要对oh my zsh进行配置的话,会出现字体乱的情况,下载字体就是为了解决这个问题。
$ brew tap homebrew/cask-fonts
$ brew cask install font-hack-nerd-font
安装好后,在item2选择字体为hack nerd font mono就行了
注: 字体来源
7 安装nvm
curl -o- https://raw.githubusercontent.com/creationix/nvm/v0.33.8/install.sh | bash
8 指定输入法快捷键绑定
就为了解决一个问题--输入切换这种反人类的方式。通过输入法切换是遍历性多状态的,哪怕快捷键也要从至少2种输入法中通过快捷键来找,至少要2步才能完成输入法的切换,1按快捷键controller + space ; 2 要看看是不是你要的输入法才能,那有没有一种快捷键就对应一种输入法?
小结: 做了这么多就是为了解决一个输入法切换确定的问题,想要哪个就哪个,而不是等系统下个列表慢慢选,被动。
9 指定启动脚本
Follow this:
- start
Automator.app - select
Application - click
Show libraryin the toolbar (if hidden) - add
Run shell script(from theActions/Utilities) - copy & paste your script into the window
- test it
- save somewhere (for example you can make an
Applicationsfolder in your HOME, you will getan your_name.app) - go to System
Preferences -> Accounts -> Login items - add this app
- test & done ;)
10 mac自动化操作--快捷键绑定自动化脚本
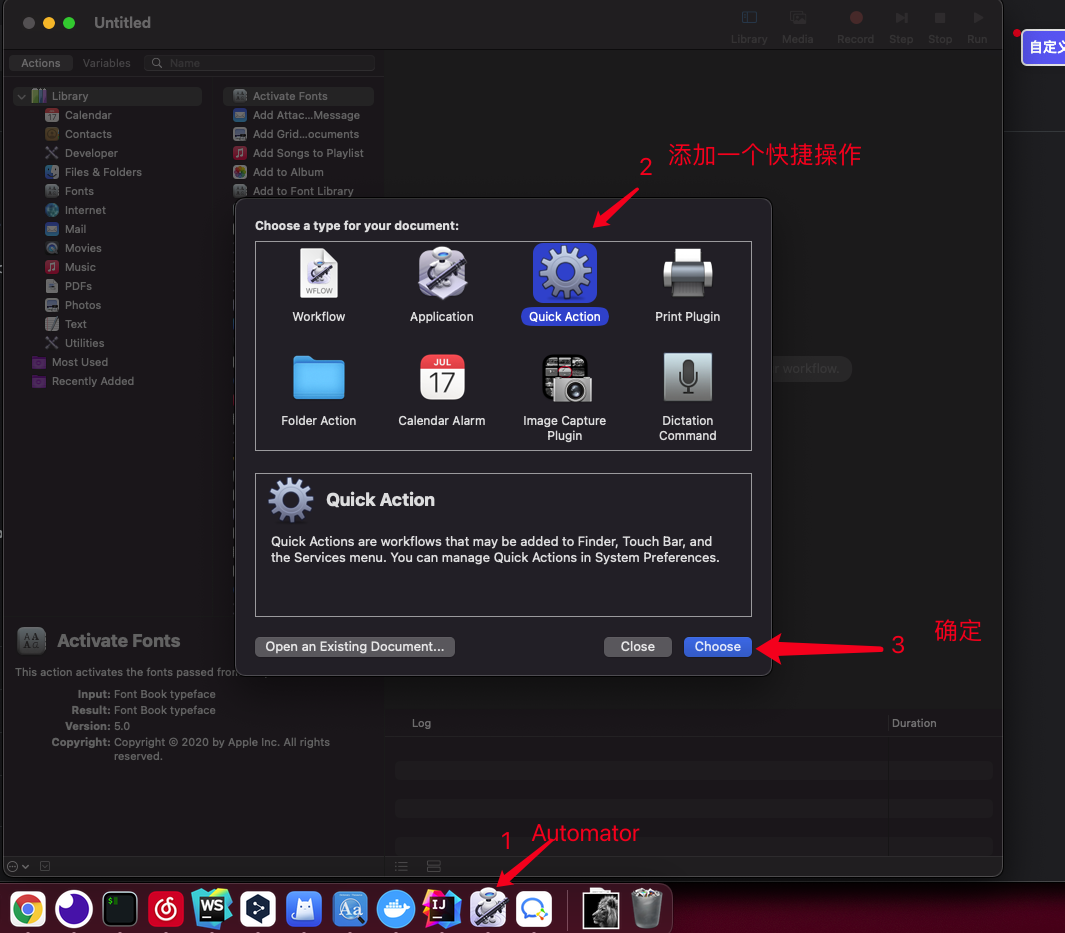
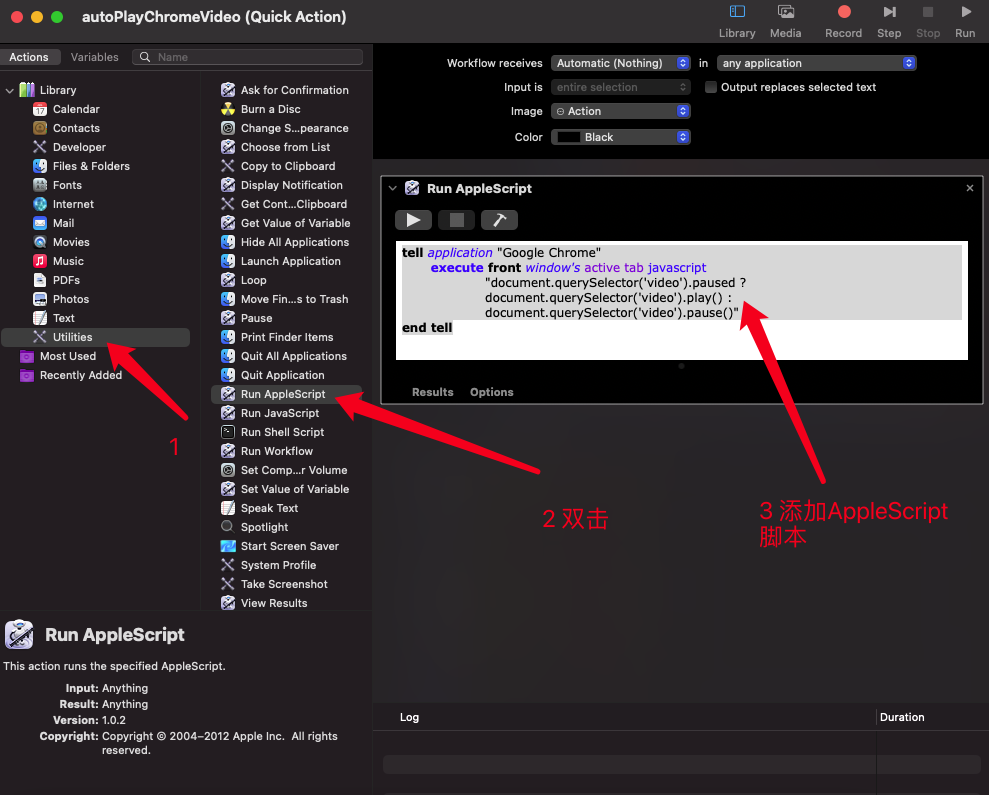
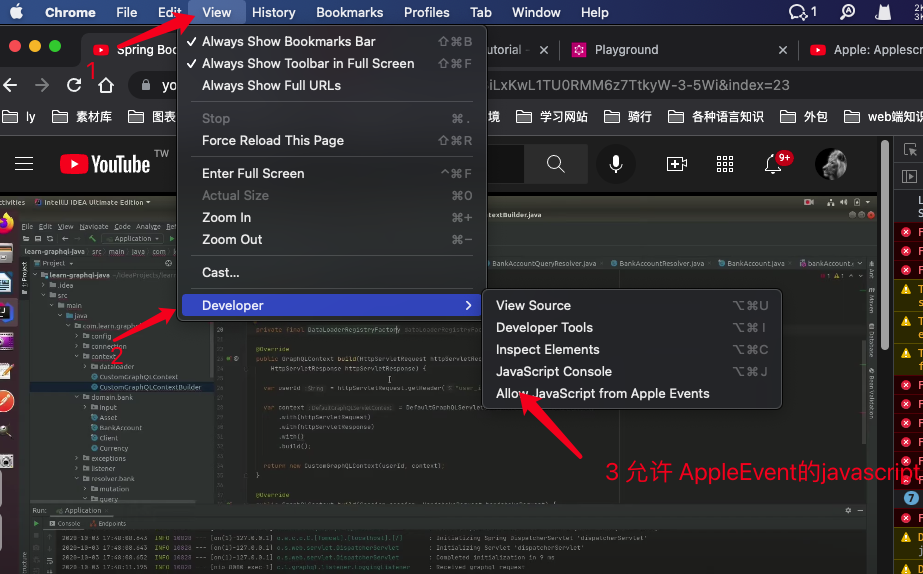
如果要通过快捷键完成一些自动化操作,可以通过automator添加一个快捷键操作,然后把操作录制或以脚本的形式声明。然后自定义自己习惯的快捷键去绑定该
快捷操作,就可以了。共2步,如下, 为一个通过快捷键在Chrome中播放视频:
10.1 添加快捷操作

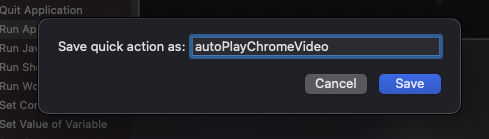
10.3 为快捷操作命名下,并保存
按command + s保存,然后弹出提示对话框,输入命名并保存就可以了。
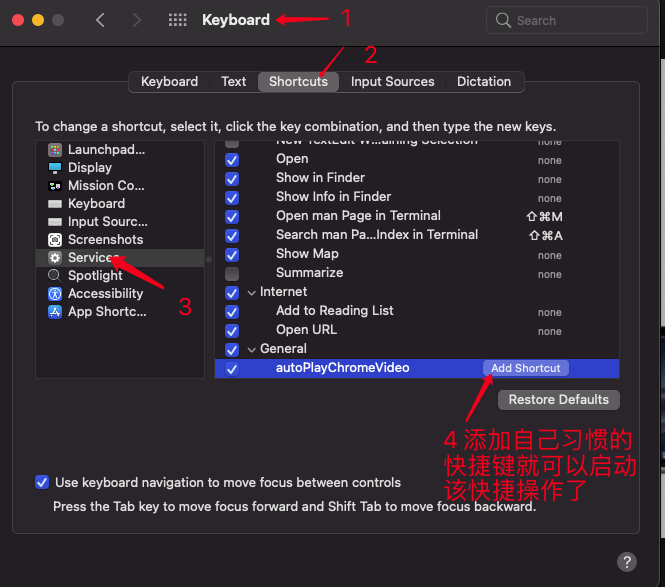
10.4 为该快捷操作绑定一个快捷键来启用该脚本,完成运行播放功能
打开setting -> Keyboard -> Shortcuts -> Services 在General下就会有个刚才命名的autoPlayChromeVideo快捷操作的选项,
添加自己习惯的快捷键就可以了。
11 homebrew FQA
- homebrew - force install even with SHA1 mismatch
$ brew install [package] --ignore-dependencies